Installing A Modern Ceiling Fan
Installing A Modern Ceiling Fan: Hey Whats Up? Today I’ll be showing you how to install a ceiling fan, as part of Wolfe’s “Bedroom Makeover. ” We are installing a brand new fan from HUNTER.
Hunter is setting the standard in ceiling fans and lighting. With their Innovative, inspiring designs they have many different styles from modern to traditional to suit any space whether its residential, commercial, indoor and outdoor.
We are fortunate enough to get the opportunity to instal one of they’re new designs in our very own space.
This site uses ads and affiliate content, earning commission on qualifying sales. Disclosure.
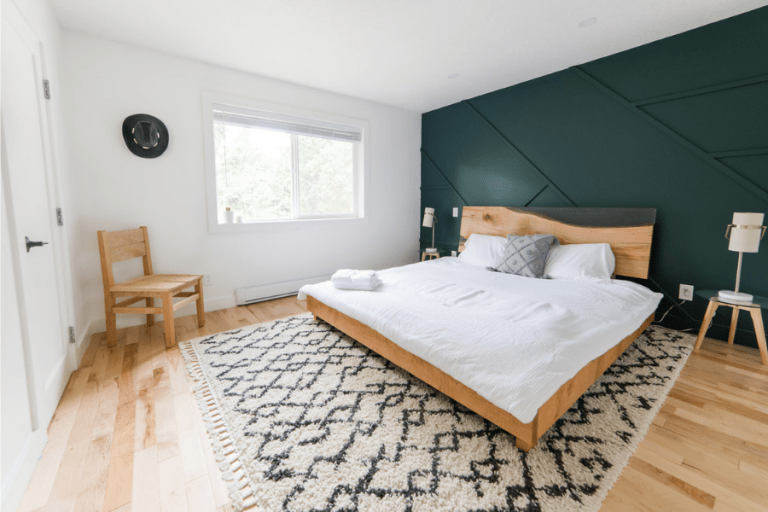
I personally selected the “Gilmor Indoor/outdoor ceiling fan in matt black“. The reason for this choice was mostly based on the design of the ceiling fan. I love how modern and clean it looked especially in matt black.
Our old ceiling fan was extremely outdated and very noisy and knowing HUNTER are known for there modern wobble free and whisper quiet ceiling fans, it was a no brainer.
The installation of our new Hunter Fan video is below.
Step 1: Turning off the breaker
Table of Contents
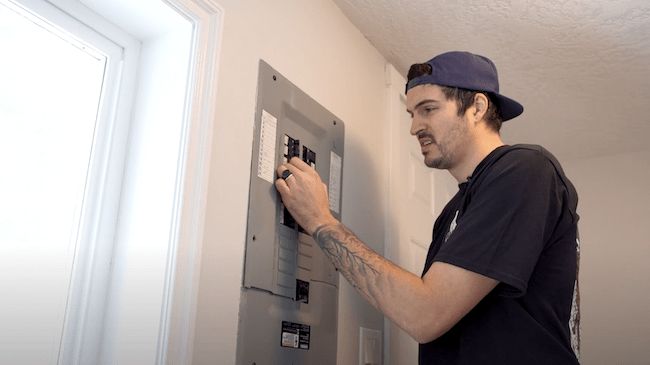
Before we begin the installation of the new ceiling fan or any electrical upgrade for that matter, its extremely important to turn off the power supply to the existing ceiling fan off at the breaker.
This is generally located in a grey metal main service box, usually located in a utility area, such as a basement, laundry room, garage, or utility closet.
Step 2 : Removing the existing ceiling fan
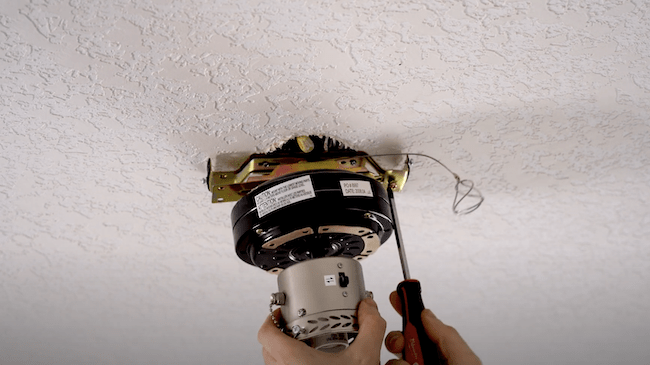
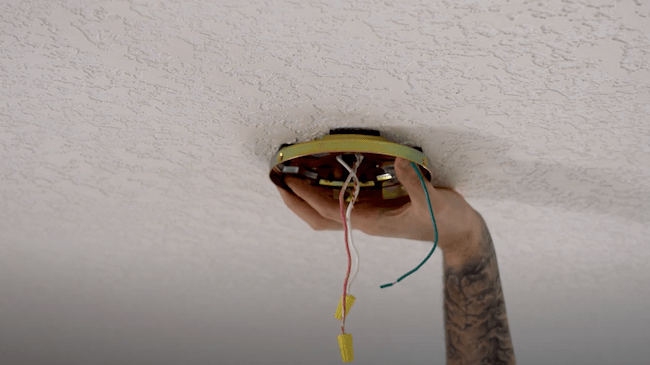
Once I was certain the the power supply to the ceiling fan was turned off, I began by removing the existing ceiling fan.
I carefully removed the bulb globe then the bulbs followed by removing the fan blades. Once the blades are removed I lowered the motor so that I can gain access to the electrical wires.
I disconnected the wires from the ceiling fan from the main supply to the house, then removed the mounting bracket holding the ceiling fan to ceiling.
Step 3 : Installing the New Mounting Bracket.
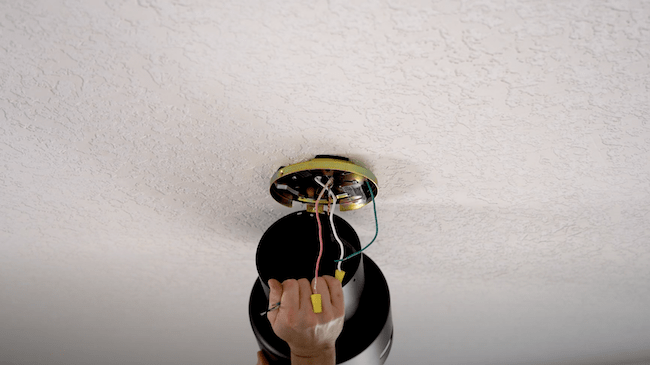
Locate the new ceiling bracket (included with the new HUNTER ceiling fan). This is what attaches the fan to the junction box in the ceiling.
If your junction box isn’t a fan rated box there are wood screws provided. The wood screws are to attach the ceiling mount to a structural stud in the ceiling to help carry the weight of the ceiling fan. You likely need to use the screws that were holding up the original ceiling fan as they’re part of the junction box, not the fan hardware.
Step 4 : Assemble motor to canopy and attach to ceiling mount.
Next I attached the motor body of the new ceiling fan to the canopy using the hardware provided. I then attach the motor to the ceiling mount by hanging the motor on the ceiling mount with the two clips. This holds the weight of the fan while you wire it in the next steps.
Step 5 : Wiring the ceiling fan
Once the fan motor is hanging on the ceiling bracket it’s now time to wire it the the main power supply. The fan comes with an in depth diagram which explains the exact wiring patterns to suit most homes.
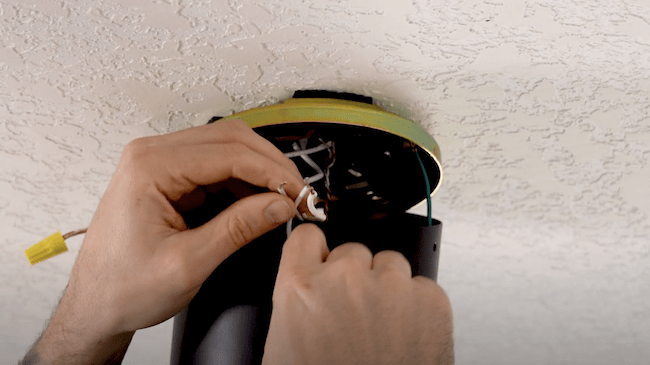
Once the new ceiling fan is successfully wired in you want to screw the motor canopy to the ceiling mount using the screws provided.

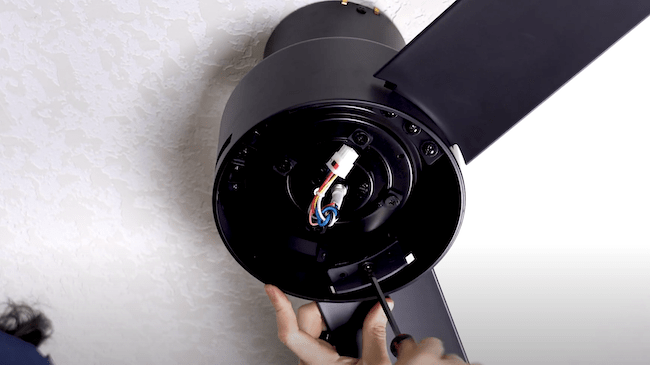
Step 6 : Attaching The Blades
Once the motor is wired in and attached to the ceiling mount next its time to attach the blades. This fan comes with 3 blades and are all screwed the fan motor using the hardware provided.
Step 7 : Assemble The Light Kit
Once the blades are attached the next steps are to assemble and attach the light kit. Once the light kit its assembled you then want to attach it the the ceiling fan motor. Make sure to connect the wires together using the block connectors.
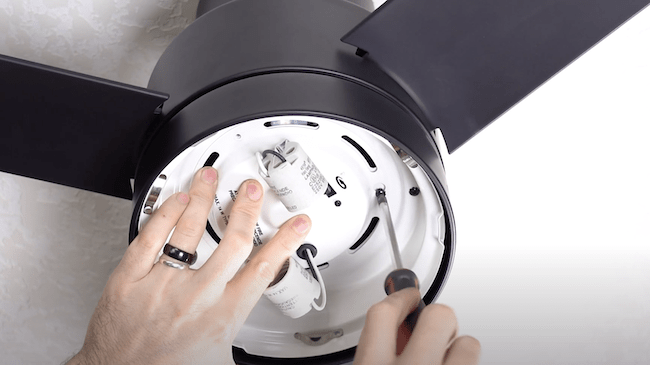
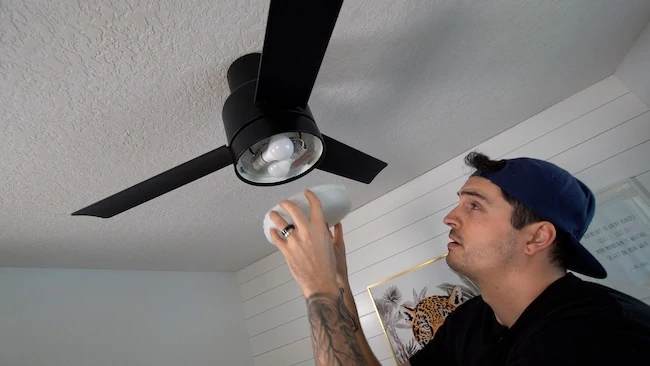
Step 8 : Insert Bulbs and Globe.
The last and final steps are to install the two light bulbs by carefully twisting them into position. Once the bulbs are installed you can now install the globe by lifting it into place and carefully turning it clockwise.
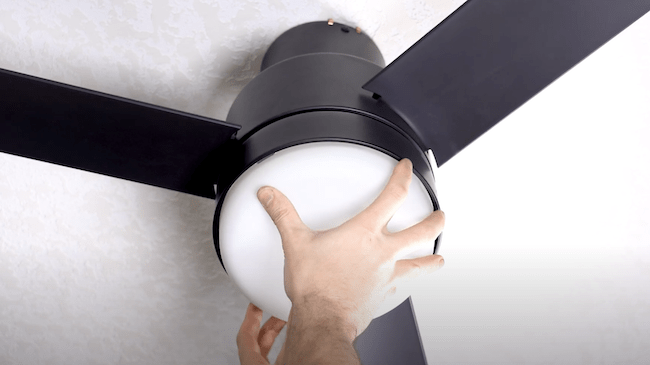
A soon as both are installed, it’s now time to turn back on the breaker, sit back and enjoy your new HUNTER Ceiling Fan.
So that wraps up today’s project, don’t forget to check out the video if you already haven’t.
Any questions let me know.
Work with me?
Apply here: raddadbuilds.com/contact/
Go follow me on Instagram for more day to day stuff RadDadBuilds
Stay Rad.