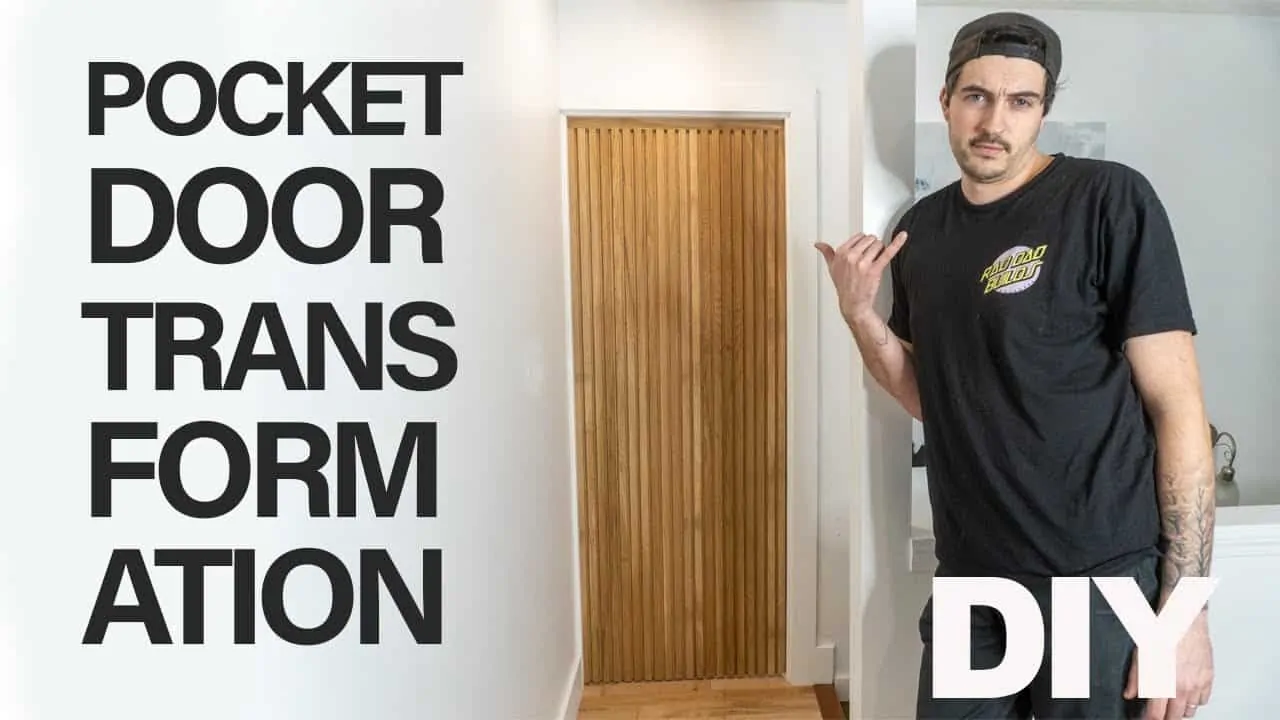
Timeless White Oak Pocket Door Transformation DIY
Pocket door transformation before and after: In this video, I am going to show you how I transformed an old, crappy, outdated pocket door to this new timeless sleek beautiful pocket door.
Although I used white oak for the wood in this door, you are not limited to this wood type. Personally for half the price in material and a similar look you could use something like fir.
I used the original pocket door frame and hardware the only thing I replaced was the actual door and the door stop and trim.
I think this is a great solution with minor construction.
This site uses ads and affiliate content, earning commission on qualifying sales. Disclosure.
Timeless White Oak Pocket Door Transformation DIY
Table of Contents
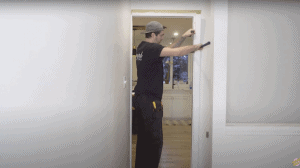
Step 1 : Removing old door and trim.
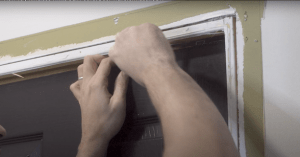
I began this project by removing the old pocket door. to remove the door I had to take of all the existing door stop and trim (desperately needed replacing anyway). I did this by cutting out the old caulk with a pocket knife , and with a bar and hammer pry the trim from its frame.
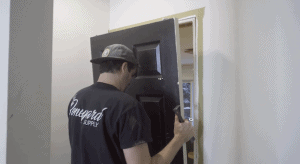
I then removed the old pocket door from the rolling hardware. Making sure to keep any existing hardware.This is adjusting the adjustable nuts until the door can be slid off its hardware.
Once the door was free I removed it out of position
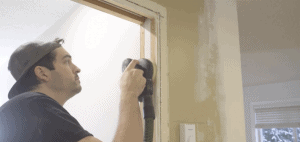
Ince the door and old trim was removed I gave the door frame a good sand ready to be repainted once the new trim is installed.
Step 2 : Making the Pocket door.
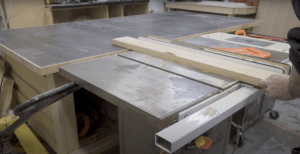
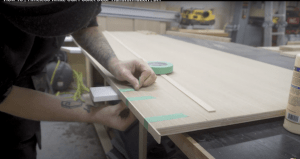
The door itself was constructed from 3/4″ white oak veneered plywood and strips of white oak. I marked out the size of the door on the plywood sheet making sure I cut it 1/2″ shorter in the width to allow for 2 x 1/4″veneer either side and 1″ shorter in height to allow for mounting strip.

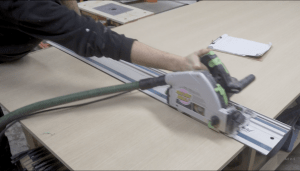
I then cut out the door shape with my Festool Tracksaw.
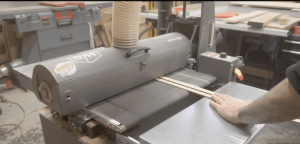
I cut two 1/4″ x 3/4″ x 80″ strips out of some white oak planks. These are to create the veneer on the side of the doors so you don’t see the grain of the plywood.

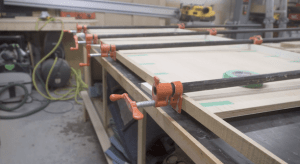
I then sanded the steps in my Super max drum sander
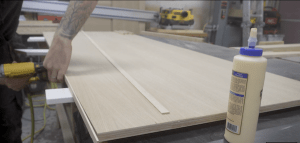
I glued then micro pinned the strips the the side of the plywood. I then taped the strips to the door for extra support while the glue dries. I also added a few clamps wherever possible.
Tools & Materials Used
This video is part of my home renovation series. There’s a whole bunch of awesome videos like this one to come.
So if you like this video and are interested to see more please subscribe and like and leave a nice comment.
Have a nice day and Stay Rad.