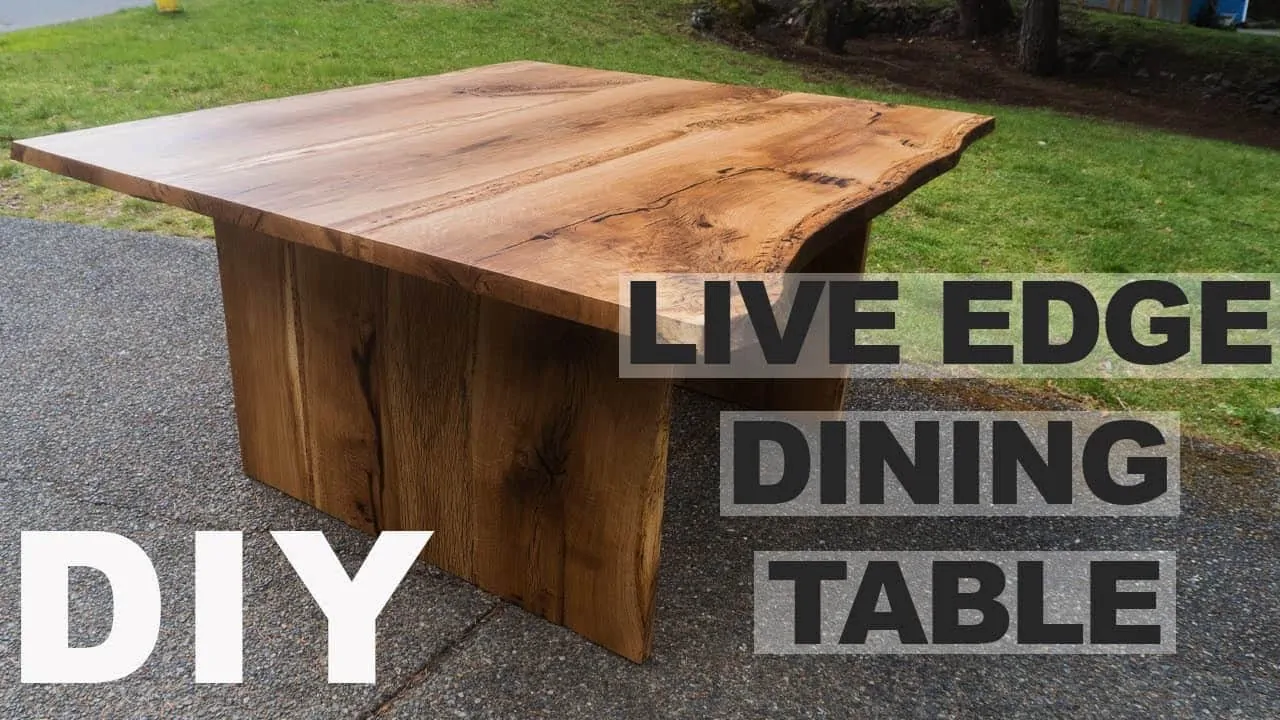
(Fire Pit Rescue) White Oak Dining Table Build
I’m going to show you how I made this really simple yet elegant natural live edge dining table. Which was destined for the fire pit.
I think this was one of my simpler builds due to the smaller amount of epoxy. Less epoxy means less hassle. Which is why this table was a real treat to build.
This table was one of my favorite builds due to how bad of condition the wooden slabs were in to start with.
Although I have fairly advanced tools I feel this table could be easily made with even the most budget of hand tools. I mention as I go along other alternatives that can be used instead of the tools I use in the video.
This site uses ads and affiliate content, earning commission on qualifying sales. Disclosure.
Video Below!
(Fire Pit Rescue) White Oak Dining Table Build
Table of Contents
Tools Used
- West System Epoxy
- Osmo Oil Extra Thin
- Osmo Oil Polyx
- White Pad
- Wire Brush Attachment
- Router Bit
- White Pad
- Threaded Insert (Select size depending on the thickness of wood)
- Screw (Select size depending on the thickness of base)
- Super Max Drum Sander
- DEWALT power tools
- King Canada Industrial tool
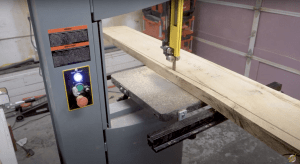
Step 1 : Preparing and milling the lumber.
With any “live Edge” build you want to make sure your lumber is nice and flat. Due to the wood I used being extremely twisted I broke all my lumber down int smaller pieces.
Being broken down into smaller pieces helps making them flat and keep the thickness.
I broke the pieces down into 3 piles. Pile 1, consists of the smaller lumber which I cut from the boards with the most twist. Pile 2, the stretchers which span from one leg of the base to the other. Pile 3 the flatter slabs which will be used for the top.

I broke down the pieces using my Dewalt Circular saw and my King Industrial Band SAW
Once all the pieces where broken down into there size groups I made the parts for the base nice and flat of two edges with my King Canada Jointer.
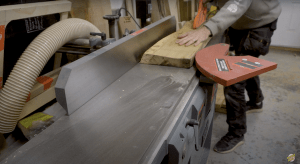
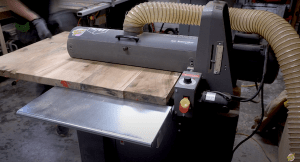
Once they have two flat edges I brought them to the thickness of 1 1/2” in with my desalt thickness planer.

STEP 2 : Glueing the base together.
Because the lumber was so twisted we had to cut and mill it into smaller pieces. Once this pieces where flat it was time to glue them back together.
I used my Festool domino cutter to help align all the small pieces while I glue them together. Though this is not necessary it does help and gives it extra strength during wood movement. Biscuits and or dowels can do the same thing.
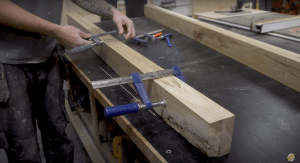
I then glue the pieces together to form the two legs of the base, using my pipe clamps.

I cut the wood to for the stretchers, because I wanted the stretchers to be thick I cut up 4 lengths so I could glue two pieces together .

I then glued the stretches together and cleaned them together.
Step 3 : Epoxy
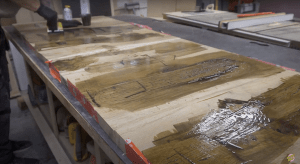
Because there were a lot of cracks and splits in the lumber which needed filling, I filled them all with dark epoxy. I used West System epoxy and black pigment. Using a speaker I filled all the crackle and splits with the epoxy. I did this 2-3 times until all cracks where filled.
Once the epoxy had dried a sanded all the pieces in my Supermax drum sander
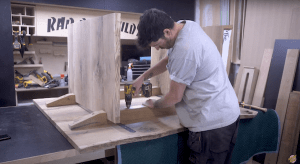
Step 4 : Cutting the base to size and assemble.
I cut all the parts to size with my Festool Track-saw.

To get a feel for the size and how far apart to put the legs of the base I dry fit it together. I then mark the stretchers and to cut out the groove for them to sit snugly together
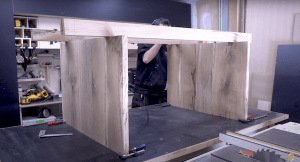
Once happy with my markings I cut out the sections out with my table saw and crosscut sled. I used a dado stack in my table saw to remove more materiel per cut.


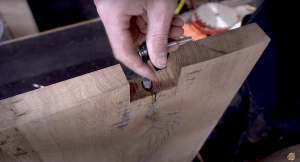
I cut a 30* angle off the end of the stretches and drilled out for the threaded inserts. This forms the fixings for the base. I also drilled out for the threaded screw in the stretchers to attach the top to the base.
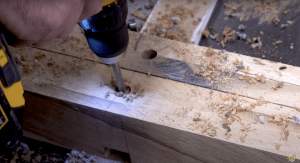
Once all the wholes where drilled I attached the threaded inserts into the base with an Allen key and 5 minutes epoxy.
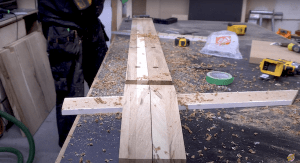
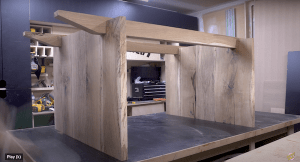
I then fit the base together to make sure I’m happy with how it all sits together.
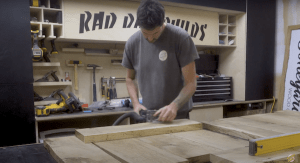
Step 5 : Milling the wood for the table top.
Because the slabs of the top where tow wide for my planer and jointer I had to get them flat using my router jig.

I then filled any splits with epoxy and gave the slabs a good sand.

Before I could glue the 3 slabs together to form the top I had to joint the inside edges. I did so in my King Canada jointer

Step 6 : The table top.
Its very difficult to clamp live edge lumber due to it being so inconsistent and in and out. So to overcome this issue I like to use ratchet straps or loading strips. I glued the 3 slabs together and once dried I gave them a good sand.


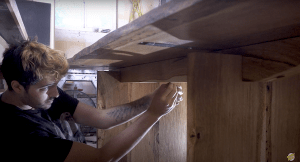
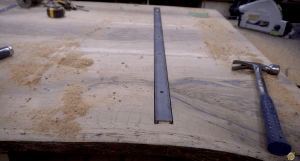
To reduce wood movement and help stop it from twisting i routered and inserted steel channel. I attached the c channel using threaded inserts.
I attached the top to the base using threaded inserts
.
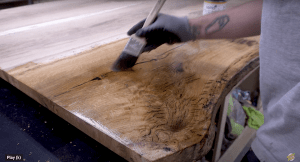
Step 7 : The finish
I finished the table using Osmo Oil Polyx. I applied the oil using a paintbrush and buffed the oil using a white pad with my polishing sander. I repeated this step 3 times allowing 8 hours drying time in-between.
Once all the parts had sufficient oil coverage I assembled the table and admired.