How to clean the chuck on your drill press
How to clean the chuck on your drill press: As I’ve mentioned in other articles on this site a drill press is a very versatile tool that can serve as a sander, and much more.
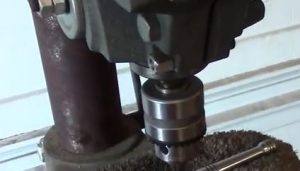
In order to operate it efficiently and perform these tasks well the chuck must be in good shape. If you don’t know what the chuck is, it’s the part that holds the drill bit (the three-jaw clamp that you tighten using the chuck key).
If the chuck is not working properly or is blocked up and dirty it won’t grip the bit very firmly and will probably result in sloppy results like imprecise drilling.
Therefore it is a good idea to carry out some routine maintenance/cleaning occasionally.
This site uses ads and affiliate content, earning commission on qualifying sales. Disclosure.
How to clean the chuck on your drill press
So first off, when going about cleaning the chuck the first thing to do is to fully disconnect the power cable for safety.
Then open up the jaws of the chuck to remove any drill bit from it. After opening the jaws fully it’s a good idea to give it a wipe with a cloth to remove any large debris.
Next, you should use an air compressor to clean it by placing the nozzle of the air compressor hose inside of the jaw opening. This step is very effective at removing smaller bits of sawdust and general muck that could be stopping the chuck from clamping properly.
After cleaning it thoroughly it’s a good idea to apply some lubrication to it. You should spray some lubricant into the jaws while they’re still open, next work the jaws open and shut several times to get the lubricant into all of the moving parts.
Once it is well lubricated up and the lubricant is worked into the jaws you can use a rag to wipe away excess.
After following these steps your drill presses chuck should be in top order.
