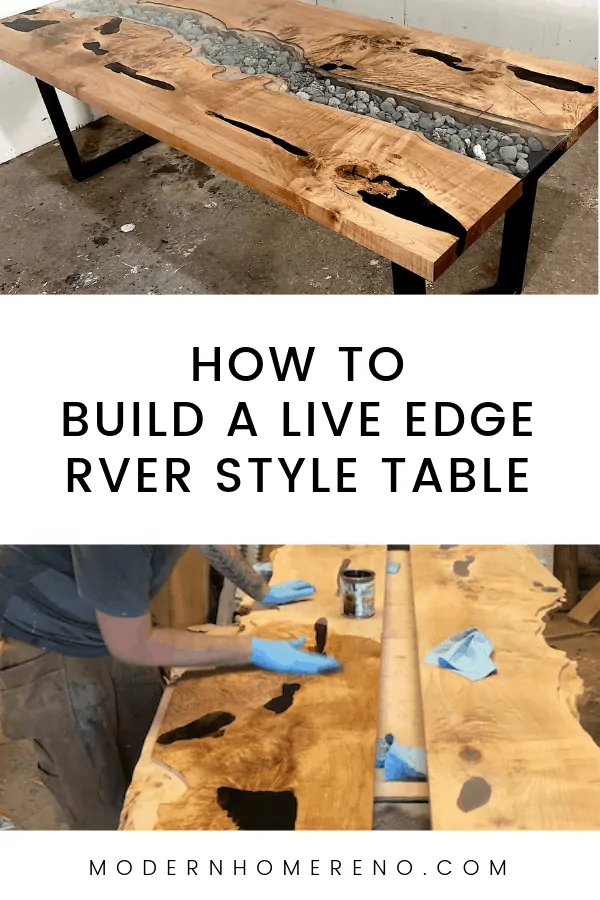
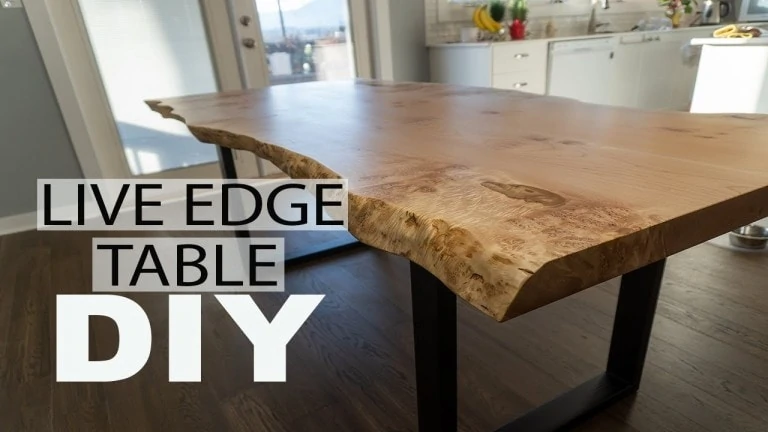
How To Build A Live Edge Table – River Style
Hey everybody. Today I want to share with you a step by step guide on how to build a live edge table. I built this DIY river style table with wood, glass, and epoxy.
The process of making a DIY live edge table takes patience and care, for sure. But although I have over a decade experience as a carpenter, you don’t need to have any formal carpentry training…really! Anyone can make a live edge table if you have the desire to learn.
How To Build A Live Edge Table – River Style Dining Table DIY
Table of Contents
This ‘ How to build a live edge table ‘ tutorial is available via my video here, as well as step-by-step written instruction below.
I hope you find this table making tutorial helpful. Let me know in the comments if you have any questions, and please subscribe to my Youtube channel.
This site uses ads and affiliate content, earning commission on qualifying sales. Disclosure.
Materials Used
- Router surfacing bit
- Eco Epoxy
- Carbide Tipped Flush Trim Plunge Template
- OSMO Polyx Hard Wax Oil
- Ridgid R2401 Trim Router
- Osmo Wood Wax Finish Extra Thin
- Glass sketch was done with Adobe Illustrator, and video edited with Premiere Pro, via Adobe Creative Cloud

1. Flatten The Slab
First, I flatten the live edge slabs using my homemade router sled and this router surfacing bit, ensuring both sides are nice and flat.
Making sure that the thickness is consistent throughout.
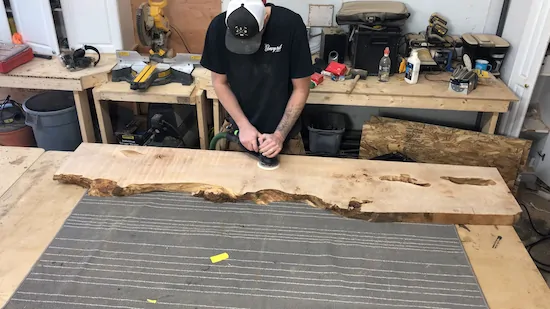
2. Sand
Ensuring that the slabs are flat, I sanded off all the markings left behind from the router.

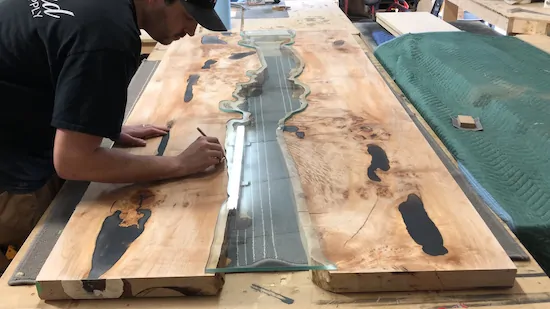
3. Plan The Layout For The Glass
I sketch a line with a pencil, 1 inch from the edge, making sure I mellow out all the sharp points. The 1 inch line is for where the glass is going to sit.
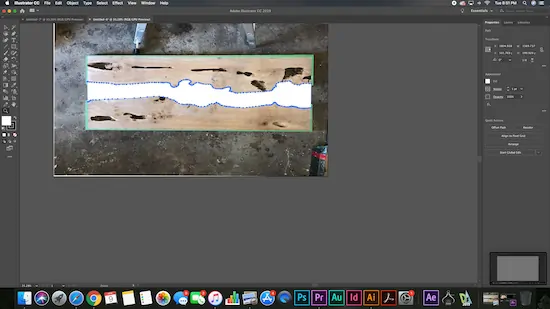
4. Sketch Out The Glass Shape
I then took a photo standing directly above, being very careful to make sure that the camera is exactly flat with the slab. I took this photo with my iPhone, using the handy grid option.
I then uploaded this image to Adobe Illustrator. We have the Adobe Creative Cloud which is super useful for all of our projects, as you get Illustrator, Photoshop for photo editing, Premier for video editing and more.
Using Illustrator’s Curvature Tool, I traced over the line, making sure there are no sharp points, everything is smooth.
Once I’ve sketched that out, I export it as a PDF and then sent it to my local CNC operator who will then use it to cut a piece of glass to the exact shape.
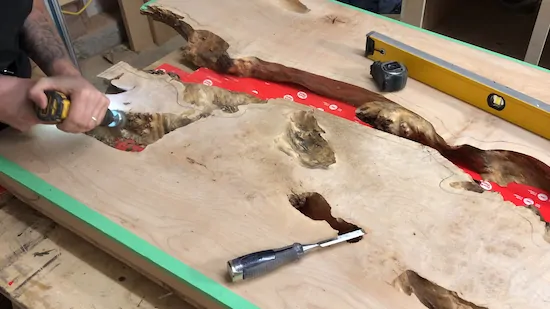
5. Clean The Debris
Using a wire brush attachment in my DeWalt 20 volt cordless drill, I begin to clean off all the loose bark and debris from all the slab’s holes pits and cracks.
This is so when you fill them with epoxy, the epoxy gets the best bond with the wood as possible.

6. Make A Dam
I then flip the slabs upside down and then begin to create a ‘dam’ effect using Dap fast drying acrylic latex silicone. This is so when the slabs are clamped down to the form, the epoxy cannot escape.
The form is something that you make from a sheet of plywood layered with construction tape, cut to the required size you need. The form acts as a casting so the epoxy doesn’t spill out all over your floor.

7. Seal The Ends
Clamping the slabs and the form down to a flat surface (my workbench), I repeated the same process of sealing the ends.

8. Prepare The Epoxy
Now for the epoxy! I use Eco Epoxy Liquid Plastic 2:1 ratio. I mixed up 6 liters (4L epoxy 2L hardener), mixing for five minutes. I let it sit for 10 minutes so that air bubbles can rise to the top.
After that, I added 3 drops of black pigment and mixed it in well.
Note: A little goes a REALLY long way!
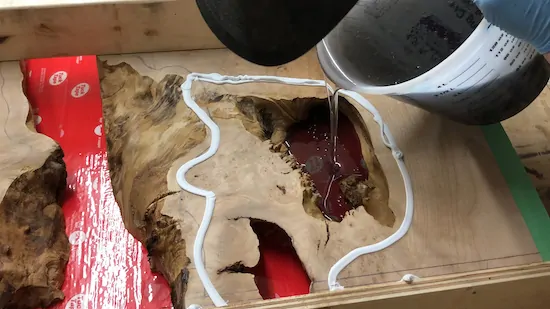
9. Pour In The Epoxy
I then filled all of the holes and cracks in the slab with the epoxy mixture. You can see here that I created a dam around the holes using the same silicon. This is so you can contain the epoxy where needed.

10. Sand, Sand, Sand…
Now for several hours of sanding…
I started using 80 grit sandpaper and then worked my way up through all the grits to 180. You really want to spend a good amount of time sanding, removing all the deficiencies in the wood.

11. Cut Out The Glass
Here is a shot of my glass being cut on a waterjet CNC. I purchased 3/8 thick glass from my local glass supplier. With the PDF file that we created earlier the CNC operator converted it to the file he needed and adjusted it to the size he needed. These sizes will vary depending on the size of the table.
The good thing about this process is that it cuts through a sheet of plywood at the same time, at the exact same size of the glass. So with the offcuts, I can use them as my template for my router, rather than using the glass itself.
12. Mark Out A Template
I laid out the slabs where they will be in their final position. I brought in the glass and placed it on top where I wanted it to sit.
I then sketched around the glass, making a line that will be the reference for the template of the outside of the glass.

13. Cut A Channel
Clamping the outer edges of the wood, along the lines I sketched I began to cut out the channel for the glass. Using my Ridgid Trim Router and Carbide tipped flush trim plunge router bit, I then began to cut out the channel. I used the plywood as my fence for the router bit to run alongside. Cutting 1/8 of an inch deep at a time.
This creates a perfect cutout of the glass.
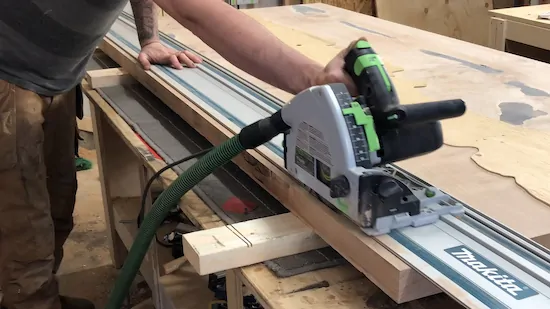
14. Cut To Final Size
I then lined up the slabs in the final position and made sure my cutout was how I wanted it by using the plywood cutout and not the glass.
Doing this allows us to reduce the chances of scratching the glass.
Once I’m happy with the position, I then start cutting the slabs to their final size, using my track saw. But you can use any kind of saw for this.

15. Clean Out Router Marks
Using a drum sander attachment in my drill, I cleaned up all the router lines. I then gave the slabs a finish sand from 180 grit sandpaper all the way through 320.
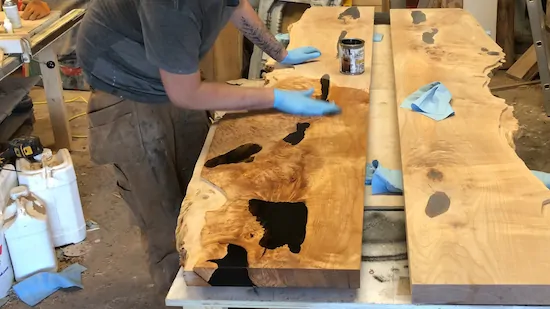
16. Oil Basecoat And Topcoat
Now we are nearing the end of building tthis live edge river style table. It’s now time to give the table it’s shiny finish.
For the base coat, I used Osmo Wood Wax Finish Extra Thin which I buffed in using a blue shop towel. I allowed it to dry for 8 hours and then buffed off any residue.
The topcoat requires two applications. I used OSMO Polyx Hard Wax Oil for the top coat of this live edge river style dining table. To apply it I used a low lint roller, using a consistent rolling technique. Ensure that it rolls on thinly.
Using a shop towel I carefully applied it into the live edge. I then allowed this to dry for 8 hoours and then repeated this step one last time.
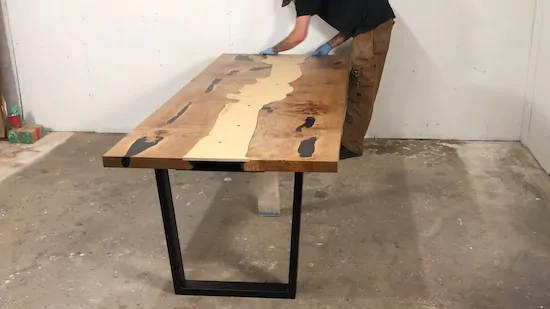
17. Attach The Base
Placing the slabs on top of the metal base, I then set the slabs into position. I used my plywood template to make sure everything is in the right spot.
You can get metal table legs like these on Amazon.
I got underneath and made a mark in the center of all the elongated holes that were in the metal base.

18. Mark For Holes
I then drilled out the holes, using threaded inserts.
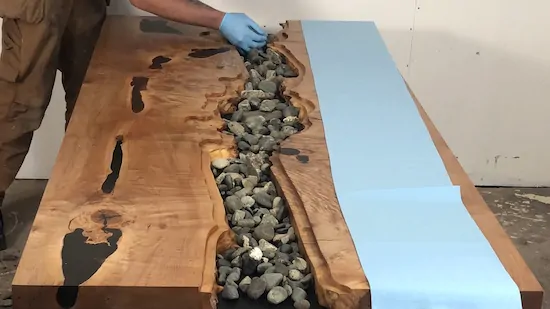
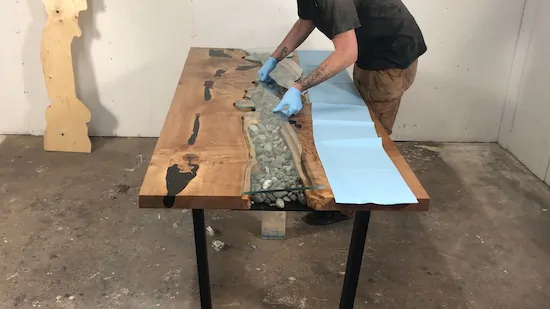
19. River Rocks
Next, I fixed the slabs to the legs, making sure there is enough slack for wood movement. Now I filled the channel with river rocks. Ensuring that the rocks are below the line of the glass.
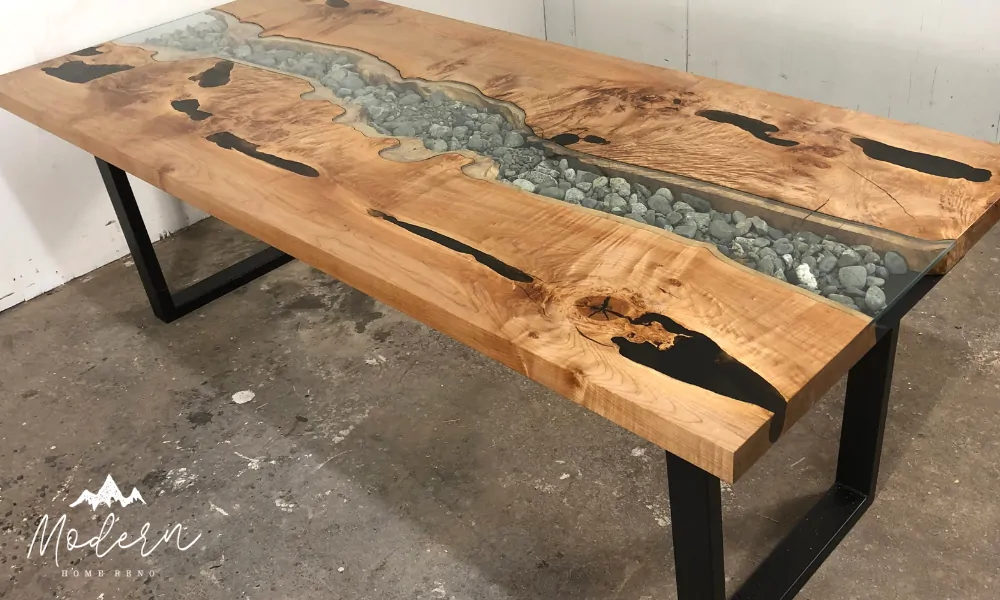
How To Build A Live Edge Table – Complete
Very carefully, I placed the glass into position.
…Done! Beer time.
What Do You Think Of This Live Edge Table Tutorial?
Let me know in the comments what you think, or if you have any questions.
As well, share this / pin it, your support is much appreciated. Swing by my Pinterest and subscribe to my Youtube for more.
Thanks for stopping by!
Pin This: